---
title: "Mailchimp to Resend"
slug: mailchimp
description: "A guide on how to quickly switch from Mailchimp to Resend."
hero_image: /static/migrate/mailchimp-resend.png
updated_at: "2026-07-29"
---
## Introduction
If you're considering migrating from Mailchimp to Resend, you're in the right place.
Most migrations between email providers are about rewriting API calls. This one isn't. Mailchimp is a marketing platform built around an audience, so the part that decides whether your migration succeeds is **which contacts you bring with you**.
Mailchimp's export makes it easy to bring the wrong ones. It gives you a ZIP containing separate files for contacts who unsubscribed and for contacts whose addresses have gone bad, and importing those is the fastest way to damage a brand-new sending reputation.
This guide covers the export, exactly what to keep, how to shape the CSV for Resend, and the API differences you'll run into afterwards.
**Jump ahead**
- **[History](#history)**
- **[Concepts](#concepts)**
- **[Export your contacts](#export-your-contacts)**
- **[Choose what to import](#choose-what-to-import)**
- **[Prepare your CSV](#prepare-your-csv)**
- **[Import into Resend](#import-into-resend)**
- **[Send your first broadcast](#send-your-first-broadcast)**
- **[Official SDKs](#official-sdks)**
- **[Send email via API](#send-email-via-api)**
- **[Send email via SMTP](#send-email-via-smtp)**
- **[Webhooks](#webhooks)**
- **[Security & Privacy](#security-privacy)**
- **[Idempotency Keys](#idempotency-keys)**
- **[Additional Features](#additional-features)**
- **[Pricing](#pricing)**
- **[Conclusion](#conclusion)**
## History
Mailchimp and Resend both send email, but they were built for different people.
**Key differences**
- Mailchimp was founded in 2001 as a marketing tool for small businesses, and was acquired by Intuit in 2021. Its model is audience-first: contacts live in an audience, and campaigns go out to that audience.
- Resend was founded in 2023 with a focus on providing a modern developer experience. Transactional email needs no contact record at all, and Broadcasts sit on top of the same infrastructure when you want to send to a list.
## Concepts
Most of what you know from Mailchimp maps onto something in Resend. The vocabulary is the main thing that changes.
**Domains**
Mailchimp asks you to verify and authenticate a sending domain before you can send from it. In Resend, domains are verified on the _Domains_ page.
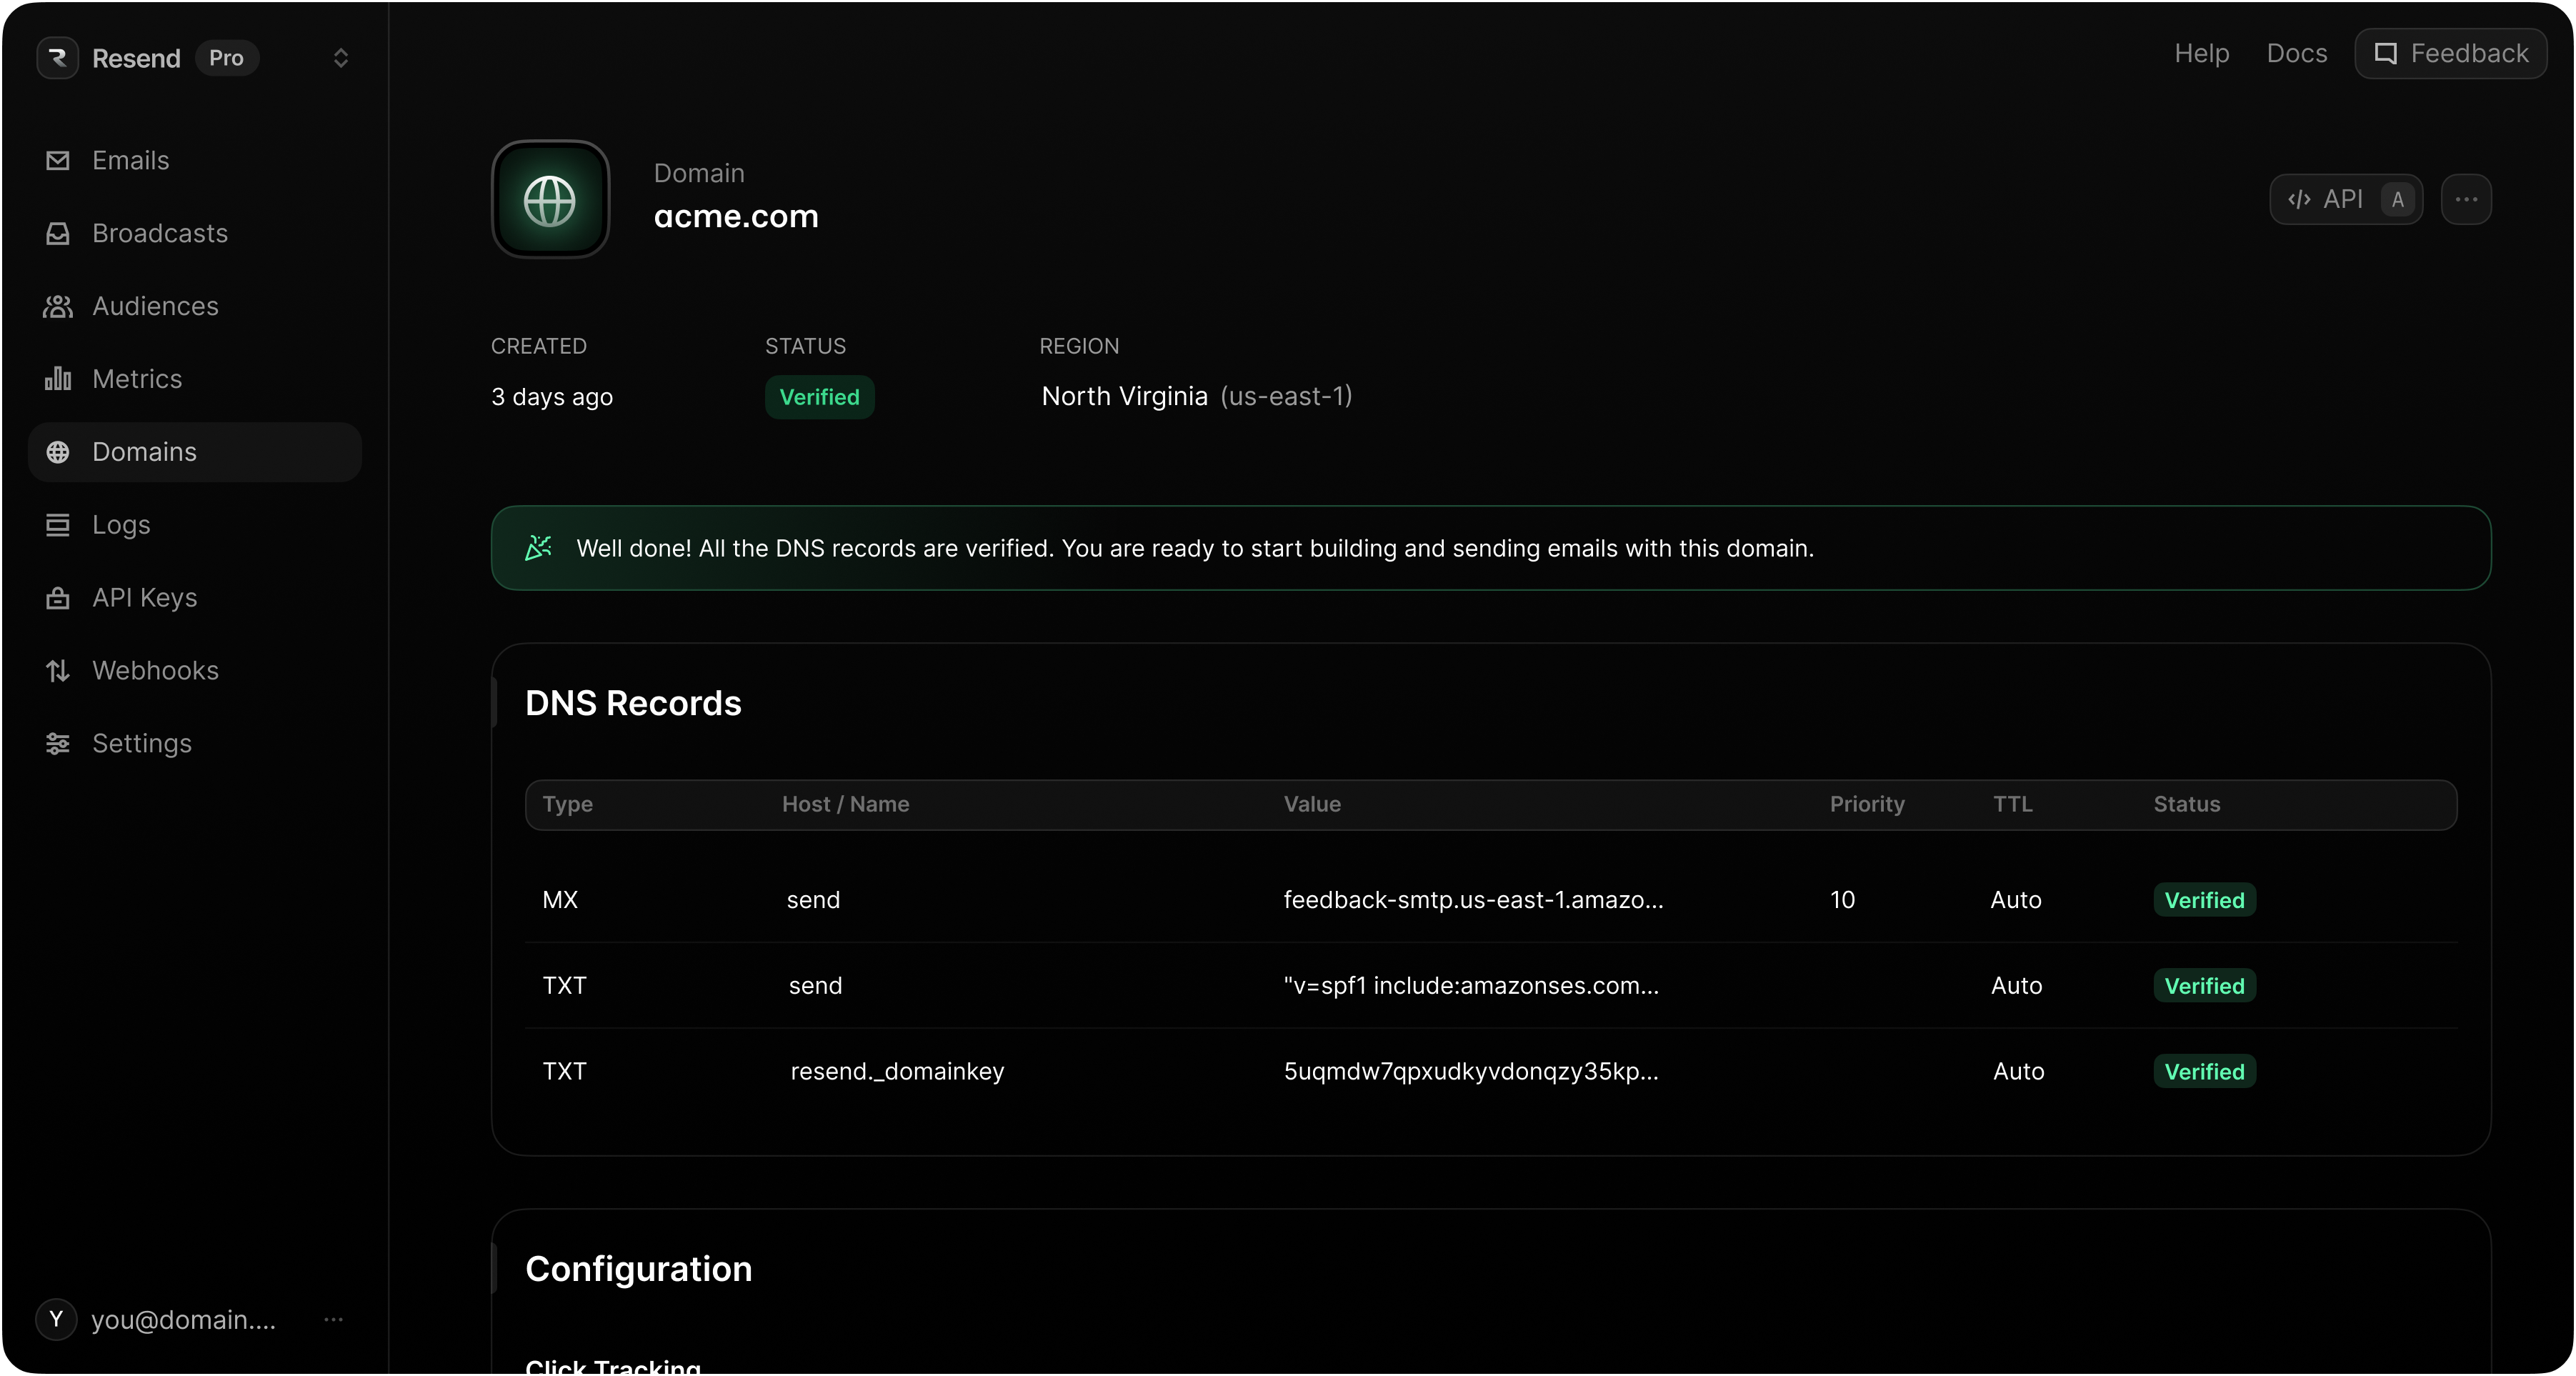 Both services authenticate your mail, with one difference worth noting: Resend enforces SPF as part of domain verification.
**Activity**
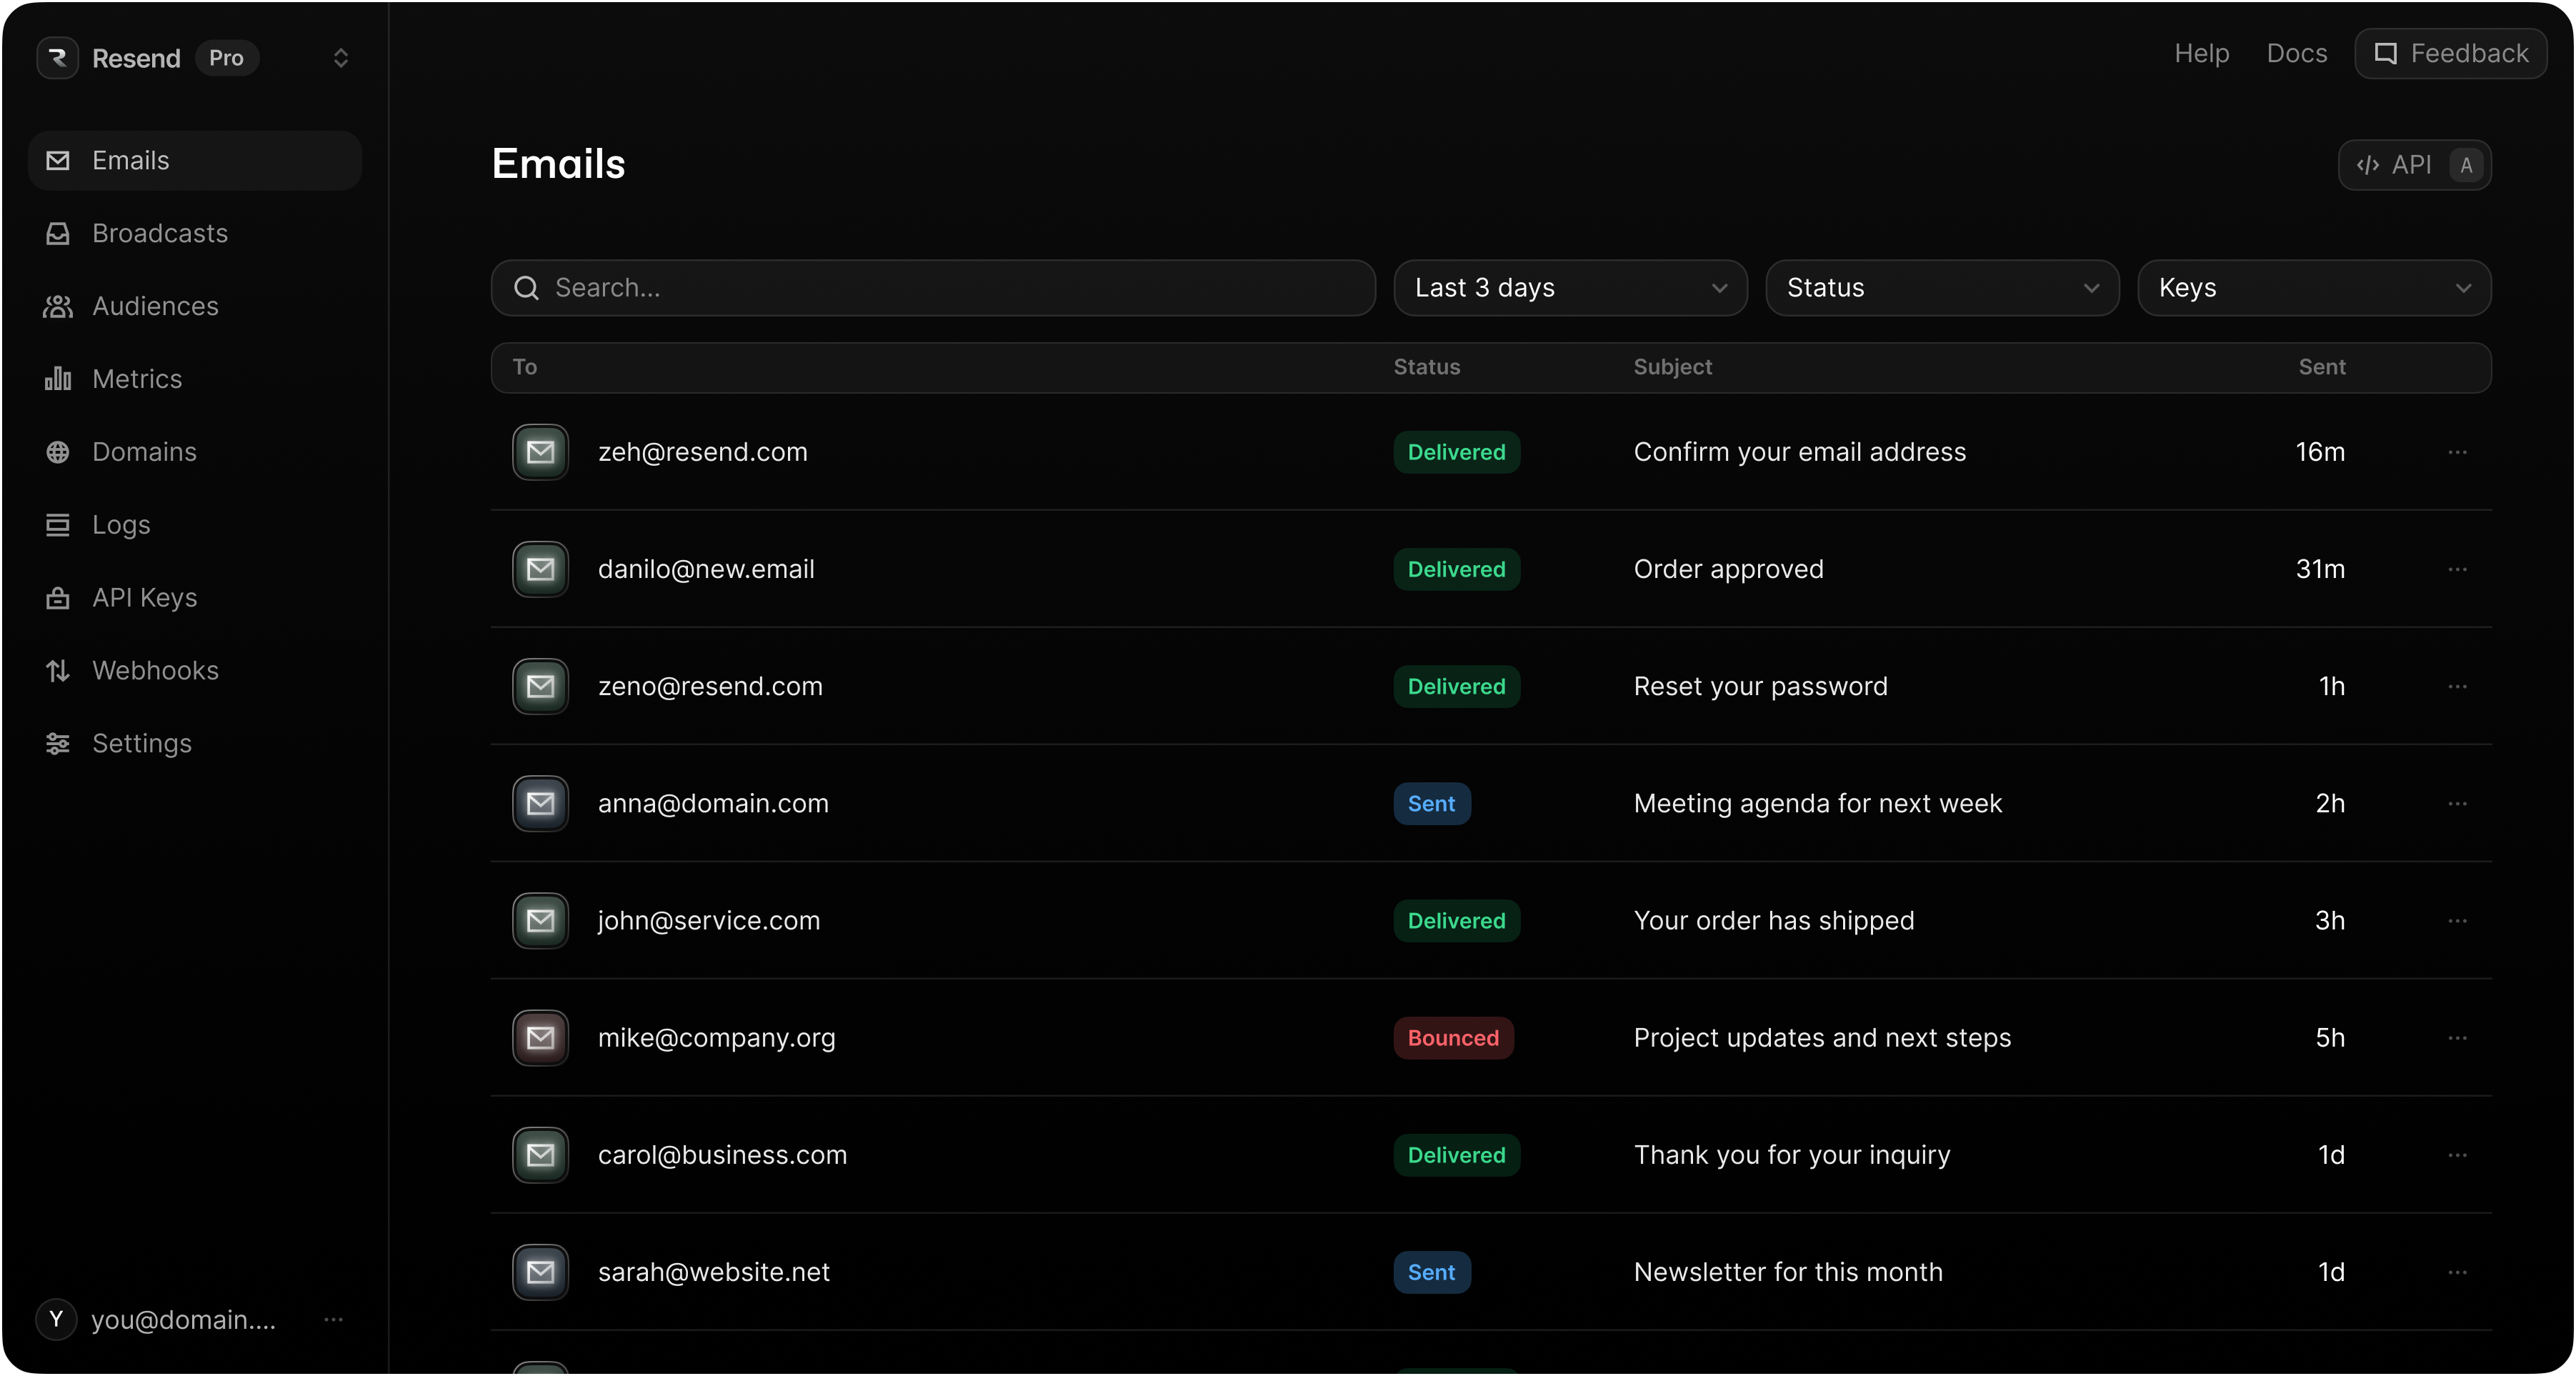
Mailchimp shows delivery activity per campaign, inside that campaign's report. Resend gives you every message, transactional and broadcast, on the _Emails_ page.
Both services authenticate your mail, with one difference worth noting: Resend enforces SPF as part of domain verification.
**Activity**
Mailchimp shows delivery activity per campaign, inside that campaign's report. Resend gives you every message, transactional and broadcast, on the _Emails_ page.
 **Dashboard**
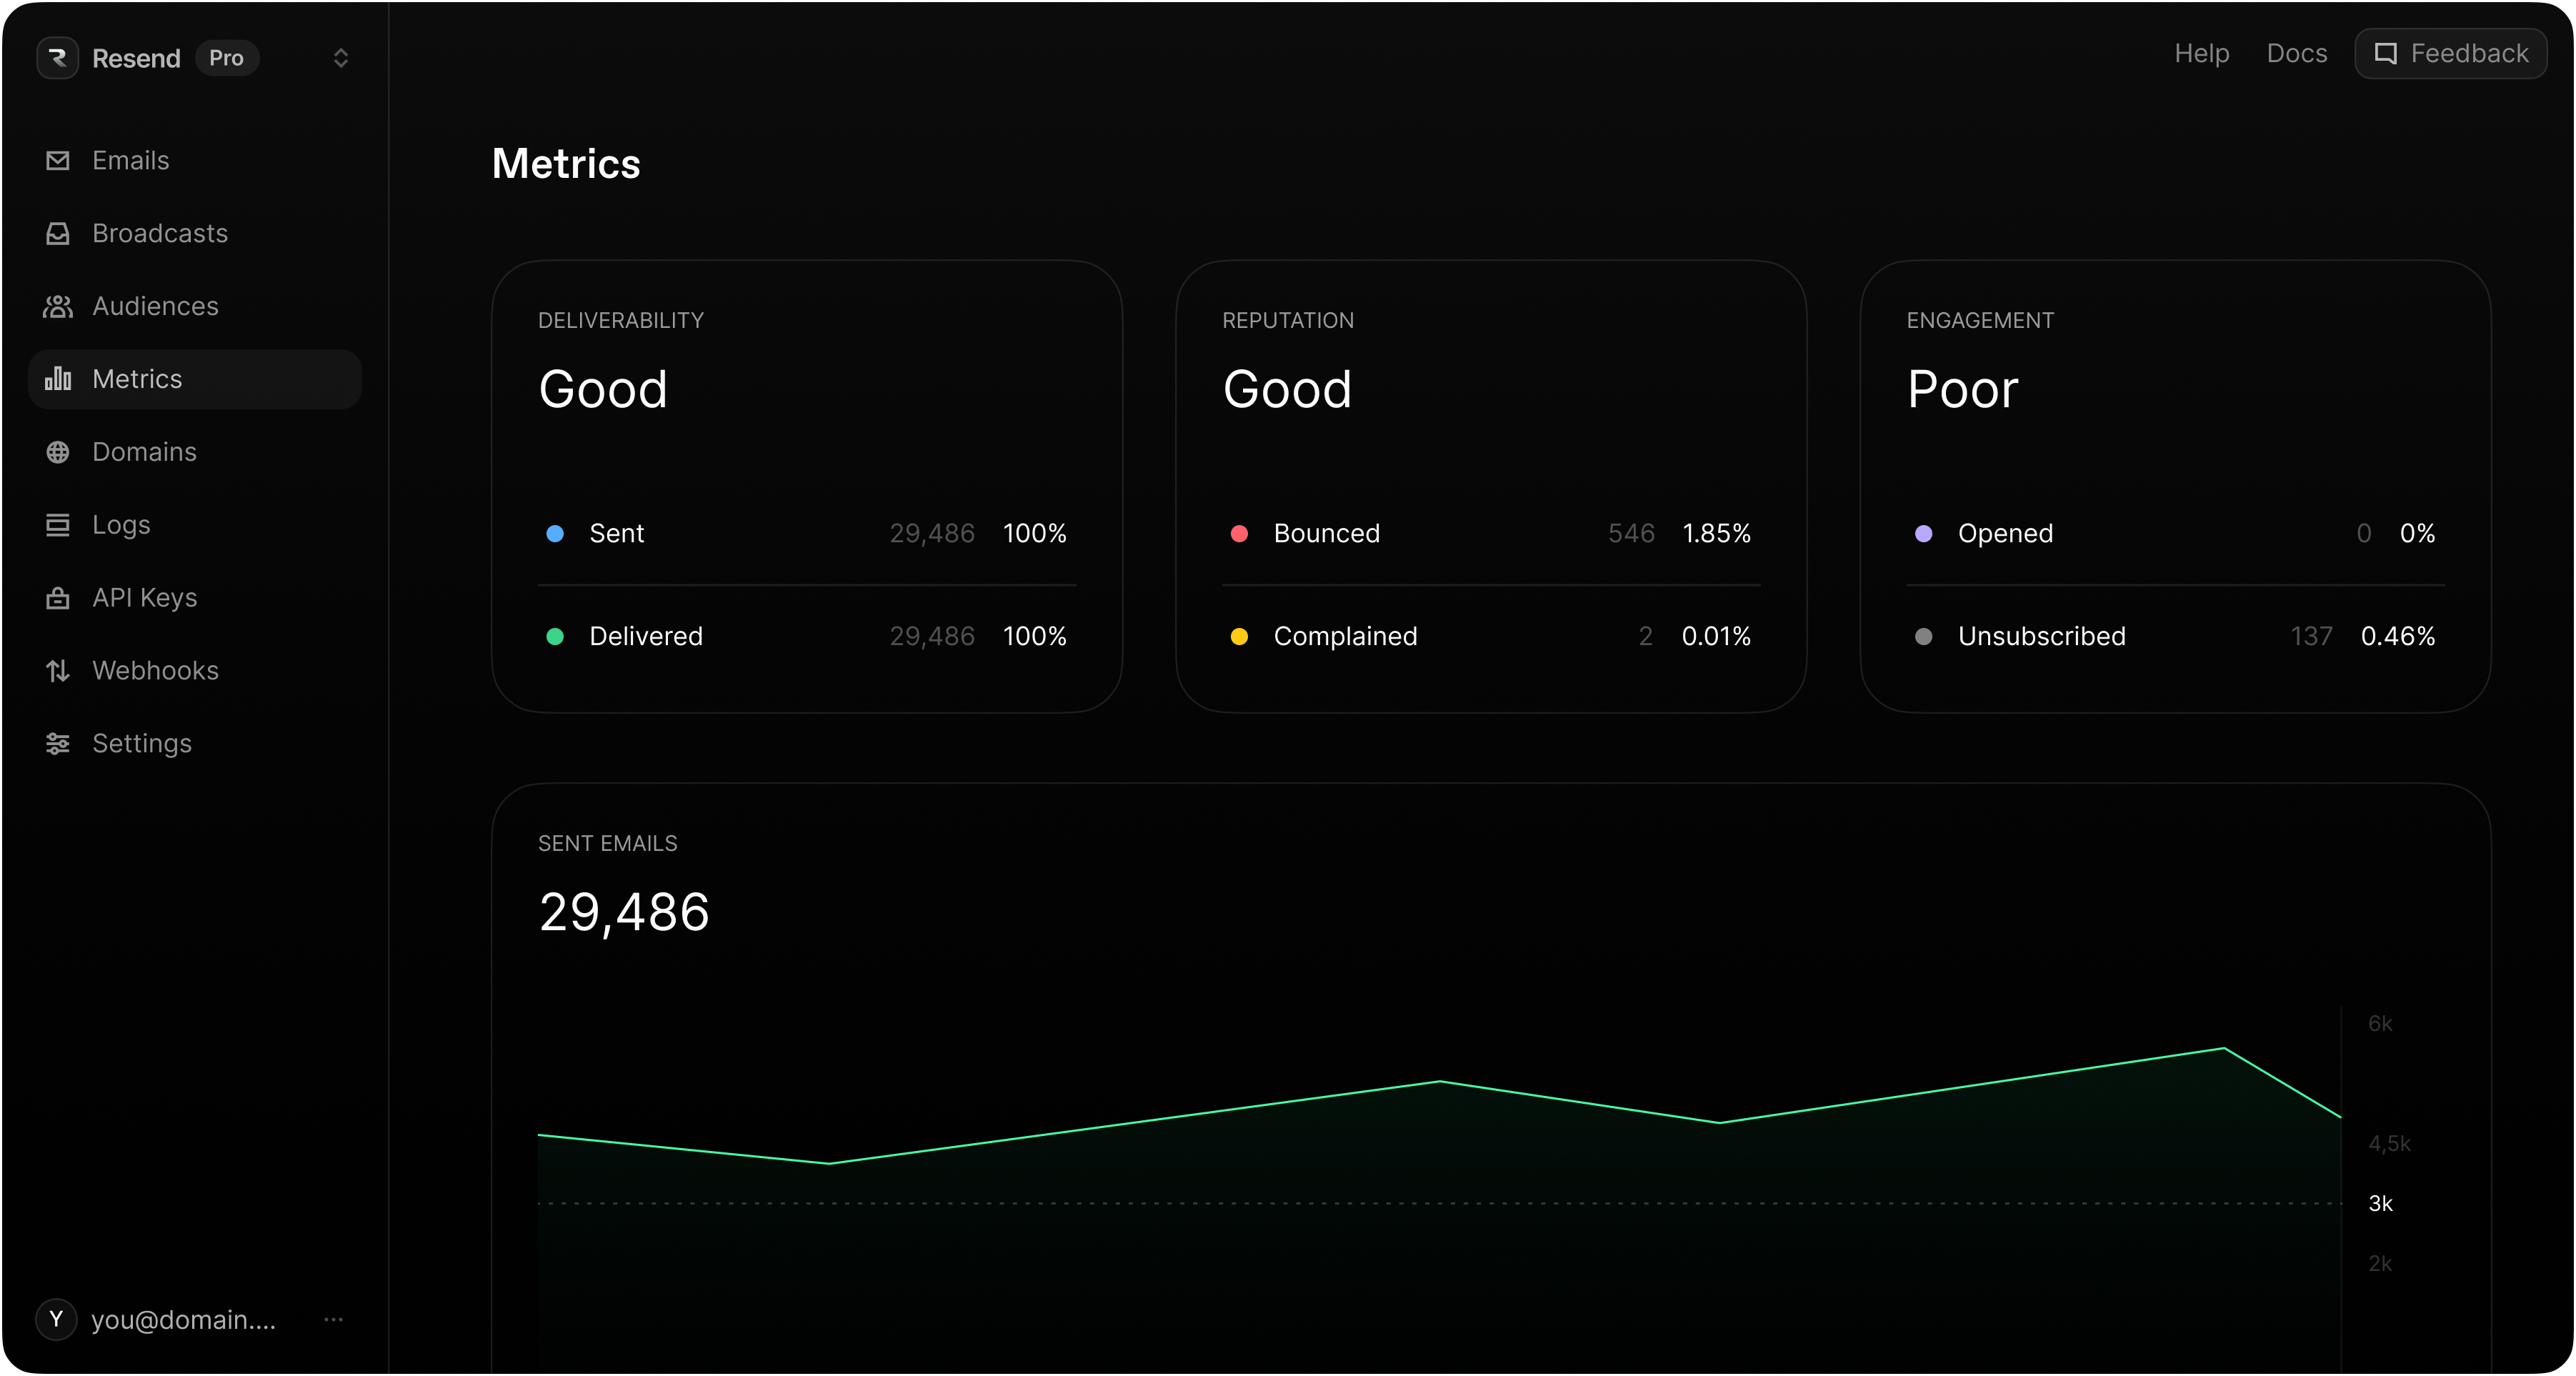
Mailchimp reports on campaign performance under _Reports_. In Resend, statistics across all your sending are shown on the _Metrics_ page.
**Dashboard**
Mailchimp reports on campaign performance under _Reports_. In Resend, statistics across all your sending are shown on the _Metrics_ page.
 ## Export your contacts
In Mailchimp, click _Audience_, then _All contacts_. Pick your audience from the drop-down if you have more than one, then click _Export audience_ and _Export as CSV_. Mailchimp emails you when the export is ready.
What arrives is not a single CSV. Mailchimp's documentation puts it plainly:
> Your export may include a ZIP file that contains separate CSV files for each type of email contact (subscribed, unsubscribed, non-subscribed, and cleaned).
Mailchimp exports are only available for 30 days. If you're planning the migration in advance, export close to when you actually intend to import.
Those four files are the whole reason this guide exists. They are not four slices of one list. They are four different consent states. In Mailchimp's own words:
- **`subscribed`**: "Someone who's opted in to receive your marketing content."
- **`unsubscribed`**: "Someone who previously received your marketing content but has opted out."
- **`non-subscribed`**: "Someone who's interacted with you but hasn't opted in to receive marketing content."
- **`cleaned`**: "Hard bounces and repeated soft bounces become cleaned contacts. A cleaned contact has a non-deliverable email address."
Only `subscribed` is a list you're allowed to email, and even then not all of it.
## Choose what to import
Here's the whole decision in one table. If you read nothing else, read this.
**Never import cleaned contacts**
A cleaned address is one Mailchimp already stopped sending to: "Cleaned addresses can't receive future emails you send to your audience." They hard bounced, or soft bounced repeatedly, and they are considered invalid. Importing them into Resend doesn't give them a second chance. It just moves a known-bad list onto a domain with no sending history, which is the worst possible moment to take a bounce spike.
**Unsubscribed and non-subscribed: import as opt-outs, or leave them out**
Neither group has permission to receive marketing from you. The only question is whether Resend should know they exist.
- **Import them with `unsubscribed` set to `true`.** This is what we recommend. Their opt-out becomes a fact in your Resend audience, so if that address ever arrives again from a different source (a signup form, a CRM sync, a second CSV), it stays suppressed. [Unsubscribed contacts](/docs/dashboard/audiences/managing-unsubscribe-list) are excluded from every broadcast.
- **Archive the files offline instead.** Smaller audience, lower cost, but the opt-out record now lives in a CSV on someone's laptop, and nothing in Resend prevents a future import from re-adding those people as subscribed.
The trade-off is billing: unsubscribed contacts still count toward your contact quota in Resend. That's the same deal you already had in Mailchimp, where subscribed, unsubscribed, and non-subscribed contacts all count toward your contact limit. If you were paying for them before, importing them costs you nothing new.
**Filtering the subscribed file**
"Subscribed" in Mailchimp is a wide net. It includes people who opted in six years ago and haven't opened anything since, and people whose address has bounced before. Two columns in the export tell you which is which.
`MEMBER_RATING` is Mailchimp's 1–5 engagement score. The bottom of that scale is a warning:
- **1 star**: "This recipient has either unsubscribed and resubscribed, or soft bounced in the past."
- **2 stars**: "No engagement. This recipient is most likely a new contact, or a previously engaged contact who's gone dormant."
- **3 stars**: "Low engagement. This recipient clicks some links in your emails."
- **4 stars**: "Moderate engagement. This recipient often clicks links in your emails."
- **5 stars**: "High engagement. This recipient consistently clicks links in your emails."
`OPTIN_TIME` is the timestamp of the signup. It's populated for contacts who came through a Mailchimp signup form, and blank for everyone else.
So the rule is:
```
Keep rows where MEMBER_RATING >= 2 AND OPTIN_TIME is not blank
```
That drops 1-star contacts, the ones with a soft bounce or an unsubscribe-then-resubscribe already on record, and drops anyone whose opt-in Mailchimp can't evidence.
It deliberately keeps 2-star contacts. Two stars is Mailchimp's **default for every new contact**, not a bad grade, so filtering to 3+ would throw away every subscriber you acquired recently who simply hasn't clicked yet.
A blank `OPTIN_TIME` only means the contact didn't arrive through a Mailchimp signup form, most commonly because you imported them into Mailchimp from somewhere else. It isn't proof that consent is missing. If you hold consent records elsewhere for those addresses, they're safe to add back.
## Prepare your CSV
Resend's contact importer reads four columns, and it matches them **exactly**. `Email Address` is not `email`, and `First Name` is not `first_name`.
Any other column you leave in the file becomes a [contact property](/docs/dashboard/audiences/properties), created automatically on import. Mailchimp's `TAGS` column is often worth keeping for that reason; `LEID`, `EUID`, `GMTOFF` and friends usually aren't.
Three things to get right before you upload:
**Lowercase the email column.** Resend deduplicates on the exact address, so `Sam@Example.com` and `sam@example.com` import as two separate contacts.
**Use `true` or `false` in the `unsubscribed` column.** The importer accepts `true`, `false`, `1` and `0`, and nothing else. `yes`, `no`, and Mailchimp's own status words like `cleaned` are ignored, and an ignored value means a new contact defaults to *subscribed*, which is exactly the outcome you're trying to avoid.
**Don't map a "subscribed" column onto `unsubscribed`.** There's no inversion. A `TRUE` in a column named `Subscribed` mapped to `unsubscribed` marks that person as opted out. Build the column fresh instead: `false` for the subscribed file, `true` for the others.
**The filter script**
This reads a Mailchimp export and writes a Resend-ready CSV. Run it once per file you're keeping.
```bash
npm install csv-parse csv-stringify
```
```javascript
// filter-mailchimp.mjs
import { createReadStream, createWriteStream } from 'node:fs';
import { parse } from 'csv-parse';
import { stringify } from 'csv-stringify';
const [input, output, status = 'subscribed'] = process.argv.slice(2);
// The subscribed export becomes subscribed contacts; every other export
// is an opt-out and must be flagged as one.
const unsubscribed = status === 'subscribed' ? 'false' : 'true';
const rows = createReadStream(input).pipe(
parse({ columns: true, bom: true, trim: true, skip_empty_lines: true }),
);
const out = stringify({
header: true,
columns: ['email', 'first_name', 'last_name', 'unsubscribed'],
});
out.pipe(createWriteStream(output));
let kept = 0;
let dropped = 0;
for await (const row of rows) {
// Resend dedupes on the exact address, so normalise before writing.
const email = (row['Email Address'] ?? '').trim().toLowerCase();
if (!email) {
dropped++;
continue;
}
// Only the subscribed file gets filtered. Opt-outs are imported whole,
// because the point of importing them is that the list is complete.
if (status === 'subscribed') {
const rating = Number.parseInt(row.MEMBER_RATING, 10);
const optinTime = (row.OPTIN_TIME ?? '').trim();
if (!optinTime || !(rating >= 2)) {
dropped++;
continue;
}
}
out.write({
email,
first_name: (row['First Name'] ?? '').trim(),
last_name: (row['Last Name'] ?? '').trim(),
unsubscribed,
});
kept++;
}
out.end();
console.log(`${input}: kept ${kept}, dropped ${dropped}`);
```
Then run it against the files from your ZIP:
```bash
node filter-mailchimp.mjs \
subscribed_members_export_a1b2c3.csv \
resend-subscribed.csv \
subscribed
node filter-mailchimp.mjs \
unsubscribed_members_export_a1b2c3.csv \
resend-unsubscribed.csv \
unsubscribed
```
Note that there's no third command. The cleaned export doesn't get one.
**Or do it in a spreadsheet**
If you'd rather not run anything, open the subscribed CSV and add a helper column:
```
=IF(AND(VALUE(D2)>=2, E2<>""), "keep", "drop")
```
Point `D2` at `MEMBER_RATING` and `E2` at `OPTIN_TIME`, fill it down, then filter to `keep`. Delete every column except the three you need, rename the headers to `email`, `first_name` and `last_name`, add an `unsubscribed` column set to `false`, and lowercase the addresses with `=LOWER(TRIM(A2))`.
## Import into Resend
**From the dashboard**
Go to _Audiences_, choose your audience, and click _Add contacts_ → _Import CSV_. The _Map properties_ step reads your headers and suggests matches, so a raw Mailchimp export works here even if you skipped the renaming. Just confirm that `Email Address` lands on `email`, and that nothing has been mapped onto `unsubscribed` by accident.
Import the subscribed file first, then the opt-outs. Existing contacts are updated rather than duplicated, and a re-import that leaves the `unsubscribed` cell empty won't resubscribe anyone who's already opted out.
**From the API**
`POST /contacts/imports` takes the file as multipart form data. Unlike the dashboard, it does no guessing. Pass a `column_map` if your headers aren't already `email`, `first_name`, `last_name` and `unsubscribed`.
```bash
curl -X POST 'https://api.resend.com/contacts/imports' \
-H 'Authorization: Bearer re_xxxxxxxxx' \
-F 'file=@subscribed_members_export_a1b2c3.csv' \
-F 'column_map={"email":"Email Address","first_name":"First Name","last_name":"Last Name"}' \
-F 'segments=[{"id":"78261eea-8f8b-4381-83c6-79fa7120f1cf"}]'
```
A bad mapping fails immediately with a `422` describing the offending column, so you find out before the file is queued. Otherwise you get an import id back and can poll it:
```bash
curl 'https://api.resend.com/contacts/imports/8f9e4b21-4a3c-4b7e-9c2d-1f6a5e8b3c40' \
-H 'Authorization: Bearer re_xxxxxxxxx'
```
```json
{
"object": "contact_import",
"id": "8f9e4b21-4a3c-4b7e-9c2d-1f6a5e8b3c40",
"status": "completed",
"counts": {
"total": 18420,
"created": 18317,
"updated": 0,
"skipped": 61,
"failed": 42
}
}
```
Those counts are worth reading rather than glancing at. `skipped` is duplicate addresses within the file. `failed` is rows dropped because the address was missing or malformed. A handful is normal in a list of any age, and the rest of the import still lands.
## Send your first broadcast
Your audience is clean, but your domain is new. Mailbox providers have no history for it, and the fastest way to create a bad one is to send your entire list on day one.
Start with your most engaged segment, then grow volume over the following weeks. The 4- and 5-star contacts you just imported are a ready-made warm-up cohort.
From there, keeping the audience clean is ongoing work rather than a one-off. It's the same discipline that made this import worth doing.
## Official SDKs
Mailchimp maintains client libraries for four languages, split across two separate APIs: one for Marketing, one for Transactional. Resend has a single API and a wider set of official SDKs.
## Send email via API
Mailchimp splits marketing and transactional email into two products. Campaigns go through the Marketing API; one-off application email goes through **Mailchimp Transactional**, the product formerly known as Mandrill, which is a paid add-on rather than part of your plan.
In Resend there's no such split. The same `POST /emails` endpoint sends a password reset and a receipt, and no contact record is required.
_Mailchimp Transactional_
```nodejs
const mailchimp = require('@mailchimp/mailchimp_transactional')('xxxxxxxxx');
await mailchimp.messages.send({
message: {
from_email: 'onboarding@resend.dev',
subject: 'hello world',
html: '
## Export your contacts
In Mailchimp, click _Audience_, then _All contacts_. Pick your audience from the drop-down if you have more than one, then click _Export audience_ and _Export as CSV_. Mailchimp emails you when the export is ready.
What arrives is not a single CSV. Mailchimp's documentation puts it plainly:
> Your export may include a ZIP file that contains separate CSV files for each type of email contact (subscribed, unsubscribed, non-subscribed, and cleaned).
Mailchimp exports are only available for 30 days. If you're planning the migration in advance, export close to when you actually intend to import.
Those four files are the whole reason this guide exists. They are not four slices of one list. They are four different consent states. In Mailchimp's own words:
- **`subscribed`**: "Someone who's opted in to receive your marketing content."
- **`unsubscribed`**: "Someone who previously received your marketing content but has opted out."
- **`non-subscribed`**: "Someone who's interacted with you but hasn't opted in to receive marketing content."
- **`cleaned`**: "Hard bounces and repeated soft bounces become cleaned contacts. A cleaned contact has a non-deliverable email address."
Only `subscribed` is a list you're allowed to email, and even then not all of it.
## Choose what to import
Here's the whole decision in one table. If you read nothing else, read this.
**Never import cleaned contacts**
A cleaned address is one Mailchimp already stopped sending to: "Cleaned addresses can't receive future emails you send to your audience." They hard bounced, or soft bounced repeatedly, and they are considered invalid. Importing them into Resend doesn't give them a second chance. It just moves a known-bad list onto a domain with no sending history, which is the worst possible moment to take a bounce spike.
**Unsubscribed and non-subscribed: import as opt-outs, or leave them out**
Neither group has permission to receive marketing from you. The only question is whether Resend should know they exist.
- **Import them with `unsubscribed` set to `true`.** This is what we recommend. Their opt-out becomes a fact in your Resend audience, so if that address ever arrives again from a different source (a signup form, a CRM sync, a second CSV), it stays suppressed. [Unsubscribed contacts](/docs/dashboard/audiences/managing-unsubscribe-list) are excluded from every broadcast.
- **Archive the files offline instead.** Smaller audience, lower cost, but the opt-out record now lives in a CSV on someone's laptop, and nothing in Resend prevents a future import from re-adding those people as subscribed.
The trade-off is billing: unsubscribed contacts still count toward your contact quota in Resend. That's the same deal you already had in Mailchimp, where subscribed, unsubscribed, and non-subscribed contacts all count toward your contact limit. If you were paying for them before, importing them costs you nothing new.
**Filtering the subscribed file**
"Subscribed" in Mailchimp is a wide net. It includes people who opted in six years ago and haven't opened anything since, and people whose address has bounced before. Two columns in the export tell you which is which.
`MEMBER_RATING` is Mailchimp's 1–5 engagement score. The bottom of that scale is a warning:
- **1 star**: "This recipient has either unsubscribed and resubscribed, or soft bounced in the past."
- **2 stars**: "No engagement. This recipient is most likely a new contact, or a previously engaged contact who's gone dormant."
- **3 stars**: "Low engagement. This recipient clicks some links in your emails."
- **4 stars**: "Moderate engagement. This recipient often clicks links in your emails."
- **5 stars**: "High engagement. This recipient consistently clicks links in your emails."
`OPTIN_TIME` is the timestamp of the signup. It's populated for contacts who came through a Mailchimp signup form, and blank for everyone else.
So the rule is:
```
Keep rows where MEMBER_RATING >= 2 AND OPTIN_TIME is not blank
```
That drops 1-star contacts, the ones with a soft bounce or an unsubscribe-then-resubscribe already on record, and drops anyone whose opt-in Mailchimp can't evidence.
It deliberately keeps 2-star contacts. Two stars is Mailchimp's **default for every new contact**, not a bad grade, so filtering to 3+ would throw away every subscriber you acquired recently who simply hasn't clicked yet.
A blank `OPTIN_TIME` only means the contact didn't arrive through a Mailchimp signup form, most commonly because you imported them into Mailchimp from somewhere else. It isn't proof that consent is missing. If you hold consent records elsewhere for those addresses, they're safe to add back.
## Prepare your CSV
Resend's contact importer reads four columns, and it matches them **exactly**. `Email Address` is not `email`, and `First Name` is not `first_name`.
Any other column you leave in the file becomes a [contact property](/docs/dashboard/audiences/properties), created automatically on import. Mailchimp's `TAGS` column is often worth keeping for that reason; `LEID`, `EUID`, `GMTOFF` and friends usually aren't.
Three things to get right before you upload:
**Lowercase the email column.** Resend deduplicates on the exact address, so `Sam@Example.com` and `sam@example.com` import as two separate contacts.
**Use `true` or `false` in the `unsubscribed` column.** The importer accepts `true`, `false`, `1` and `0`, and nothing else. `yes`, `no`, and Mailchimp's own status words like `cleaned` are ignored, and an ignored value means a new contact defaults to *subscribed*, which is exactly the outcome you're trying to avoid.
**Don't map a "subscribed" column onto `unsubscribed`.** There's no inversion. A `TRUE` in a column named `Subscribed` mapped to `unsubscribed` marks that person as opted out. Build the column fresh instead: `false` for the subscribed file, `true` for the others.
**The filter script**
This reads a Mailchimp export and writes a Resend-ready CSV. Run it once per file you're keeping.
```bash
npm install csv-parse csv-stringify
```
```javascript
// filter-mailchimp.mjs
import { createReadStream, createWriteStream } from 'node:fs';
import { parse } from 'csv-parse';
import { stringify } from 'csv-stringify';
const [input, output, status = 'subscribed'] = process.argv.slice(2);
// The subscribed export becomes subscribed contacts; every other export
// is an opt-out and must be flagged as one.
const unsubscribed = status === 'subscribed' ? 'false' : 'true';
const rows = createReadStream(input).pipe(
parse({ columns: true, bom: true, trim: true, skip_empty_lines: true }),
);
const out = stringify({
header: true,
columns: ['email', 'first_name', 'last_name', 'unsubscribed'],
});
out.pipe(createWriteStream(output));
let kept = 0;
let dropped = 0;
for await (const row of rows) {
// Resend dedupes on the exact address, so normalise before writing.
const email = (row['Email Address'] ?? '').trim().toLowerCase();
if (!email) {
dropped++;
continue;
}
// Only the subscribed file gets filtered. Opt-outs are imported whole,
// because the point of importing them is that the list is complete.
if (status === 'subscribed') {
const rating = Number.parseInt(row.MEMBER_RATING, 10);
const optinTime = (row.OPTIN_TIME ?? '').trim();
if (!optinTime || !(rating >= 2)) {
dropped++;
continue;
}
}
out.write({
email,
first_name: (row['First Name'] ?? '').trim(),
last_name: (row['Last Name'] ?? '').trim(),
unsubscribed,
});
kept++;
}
out.end();
console.log(`${input}: kept ${kept}, dropped ${dropped}`);
```
Then run it against the files from your ZIP:
```bash
node filter-mailchimp.mjs \
subscribed_members_export_a1b2c3.csv \
resend-subscribed.csv \
subscribed
node filter-mailchimp.mjs \
unsubscribed_members_export_a1b2c3.csv \
resend-unsubscribed.csv \
unsubscribed
```
Note that there's no third command. The cleaned export doesn't get one.
**Or do it in a spreadsheet**
If you'd rather not run anything, open the subscribed CSV and add a helper column:
```
=IF(AND(VALUE(D2)>=2, E2<>""), "keep", "drop")
```
Point `D2` at `MEMBER_RATING` and `E2` at `OPTIN_TIME`, fill it down, then filter to `keep`. Delete every column except the three you need, rename the headers to `email`, `first_name` and `last_name`, add an `unsubscribed` column set to `false`, and lowercase the addresses with `=LOWER(TRIM(A2))`.
## Import into Resend
**From the dashboard**
Go to _Audiences_, choose your audience, and click _Add contacts_ → _Import CSV_. The _Map properties_ step reads your headers and suggests matches, so a raw Mailchimp export works here even if you skipped the renaming. Just confirm that `Email Address` lands on `email`, and that nothing has been mapped onto `unsubscribed` by accident.
Import the subscribed file first, then the opt-outs. Existing contacts are updated rather than duplicated, and a re-import that leaves the `unsubscribed` cell empty won't resubscribe anyone who's already opted out.
**From the API**
`POST /contacts/imports` takes the file as multipart form data. Unlike the dashboard, it does no guessing. Pass a `column_map` if your headers aren't already `email`, `first_name`, `last_name` and `unsubscribed`.
```bash
curl -X POST 'https://api.resend.com/contacts/imports' \
-H 'Authorization: Bearer re_xxxxxxxxx' \
-F 'file=@subscribed_members_export_a1b2c3.csv' \
-F 'column_map={"email":"Email Address","first_name":"First Name","last_name":"Last Name"}' \
-F 'segments=[{"id":"78261eea-8f8b-4381-83c6-79fa7120f1cf"}]'
```
A bad mapping fails immediately with a `422` describing the offending column, so you find out before the file is queued. Otherwise you get an import id back and can poll it:
```bash
curl 'https://api.resend.com/contacts/imports/8f9e4b21-4a3c-4b7e-9c2d-1f6a5e8b3c40' \
-H 'Authorization: Bearer re_xxxxxxxxx'
```
```json
{
"object": "contact_import",
"id": "8f9e4b21-4a3c-4b7e-9c2d-1f6a5e8b3c40",
"status": "completed",
"counts": {
"total": 18420,
"created": 18317,
"updated": 0,
"skipped": 61,
"failed": 42
}
}
```
Those counts are worth reading rather than glancing at. `skipped` is duplicate addresses within the file. `failed` is rows dropped because the address was missing or malformed. A handful is normal in a list of any age, and the rest of the import still lands.
## Send your first broadcast
Your audience is clean, but your domain is new. Mailbox providers have no history for it, and the fastest way to create a bad one is to send your entire list on day one.
Start with your most engaged segment, then grow volume over the following weeks. The 4- and 5-star contacts you just imported are a ready-made warm-up cohort.
From there, keeping the audience clean is ongoing work rather than a one-off. It's the same discipline that made this import worth doing.
## Official SDKs
Mailchimp maintains client libraries for four languages, split across two separate APIs: one for Marketing, one for Transactional. Resend has a single API and a wider set of official SDKs.
## Send email via API
Mailchimp splits marketing and transactional email into two products. Campaigns go through the Marketing API; one-off application email goes through **Mailchimp Transactional**, the product formerly known as Mandrill, which is a paid add-on rather than part of your plan.
In Resend there's no such split. The same `POST /emails` endpoint sends a password reset and a receipt, and no contact record is required.
_Mailchimp Transactional_
```nodejs
const mailchimp = require('@mailchimp/mailchimp_transactional')('xxxxxxxxx');
await mailchimp.messages.send({
message: {
from_email: 'onboarding@resend.dev',
subject: 'hello world',
html: 'it works!
',
to: [{ email: 'delivered@resend.dev', type: 'to' }],
},
});
```
```python
import mailchimp_transactional
client = mailchimp_transactional.Client("xxxxxxxxx")
client.messages.send({"message": {
"from_email": "onboarding@resend.dev",
"subject": "hello world",
"html": "it works!
",
"to": [{"email": "delivered@resend.dev", "type": "to"}],
}})
```
```php
$mailchimp = new MailchimpTransactional\ApiClient();
$mailchimp->setApiKey('xxxxxxxxx');
$mailchimp->messages->send(["message" => [
'from_email' => 'onboarding@resend.dev',
'subject' => 'hello world',
'html' => 'it works!
',
'to' => [['email' => 'delivered@resend.dev', 'type' => 'to']],
]]);
```
```ruby
require "MailchimpTransactional"
client = MailchimpTransactional::Client.new("xxxxxxxxx")
client.messages.send({ message: {
from_email: "onboarding@resend.dev",
subject: "hello world",
html: "it works!
",
to: [{ email: "delivered@resend.dev", type: "to" }],
}})
```
```curl
curl -X POST 'https://mandrillapp.com/api/1.0/messages/send' \
-H 'Content-Type: application/json' \
-d $'{
"key": "xxxxxxxxx",
"message": {
"from_email": "onboarding@resend.dev",
"subject": "hello world",
"html": "it works!
",
"to": [{ "email": "delivered@resend.dev", "type": "to" }]
}
}'
```
_Resend_
```nodejs
import { Resend } from 'resend';
const resend = new Resend('re_xxxxxxxxx');
await resend.emails.send({
from: 'Acme ',
to: ['delivered@resend.dev'],
subject: 'hello world',
html: 'it works!
',
});
```
```python
import resend
resend.api_key = "re_xxxxxxxxx"
resend.Emails.send({
"from": "Acme ",
"to": ["delivered@resend.dev"],
"subject": "hello world",
"html": "it works!
"
})
```
```php
$resend = Resend::client('re_xxxxxxxxx');
$resend->emails->send([
'from' => 'Acme ',
'to' => ['delivered@resend.dev'],
'subject' => 'hello world',
'html' => 'it works!
',
]);
```
```ruby
require "resend"
Resend.api_key = 're_xxxxxxxxx'
Resend::Emails.send({
from: 'Acme ',
to: ['delivered@resend.dev'],
subject: 'hello world',
html: 'it works!
'
})
```
```go
ctx := context.TODO()
client := resend.NewClient("re_xxxxxxxxx")
params := &resend.SendEmailRequest{
From: "Acme ",
To: []string{"delivered@resend.dev"},
Subject: "hello world",
Html: "it works!
",
}
_, err := client.Emails.SendWithContext(ctx, params)
if err != nil {
panic(err)
}
```
```curl
curl -X POST 'https://api.resend.com/emails' \
-H 'Authorization: Bearer re_xxxxxxxxx' \
-H 'Content-Type: application/json' \
-d $'{
"from": "Acme ",
"to": ["delivered@resend.dev"],
"subject": "hello world",
"html": "it works!
"
}'
```
To send to your whole audience the way a Mailchimp campaign would, use [Broadcasts](/docs/dashboard/broadcasts/introduction) instead, from the dashboard or via `POST /broadcasts`.
## Send email via SMTP
Both platforms offer SMTP, but on Mailchimp's side it belongs to the Transactional add-on rather than the marketing product.
## Webhooks
Mailchimp has two unrelated webhook systems: audience webhooks on the Marketing API, which fire when someone subscribes or unsubscribes, and message webhooks on Mailchimp Transactional. Resend delivers both kinds of event through a single webhook endpoint.
## Security & Privacy
Mailchimp and Resend have broadly similar security postures. Mailchimp, as part of Intuit, additionally holds ISO 27001.
## Idempotency Keys
Resend supports idempotency keys on the `POST /emails` and `POST /emails/batch` endpoints.
> Mailchimp Transactional does not offer an idempotency header or key on its send endpoints.
An idempotent operation is an action you can perform more than once, with the same input, and it always produces the same outcome and avoids repeating side effects.
By adding an `Idempotency-Key` header, or using the equivalent field on our SDKs, you can tell Resend that this specific email should only be sent once, even if we get more than one request from you about it.
```nodejs
await resend.emails.send(
{
from: 'Acme ',
to: ['delivered@resend.dev'],
subject: 'hello world',
html: 'it works!
',
},
{
idempotencyKey: 'welcome-user/123456789',
},
);
```
```python
params: resend.Emails.SendParams = {
"from": "Acme ",
"to": ["delivered@resend.dev"],
"subject": "hello world",
"html": "it works!
"
}
options: resend.Emails.SendOptions = {
"idempotency_key": "welcome-user/123456789",
}
resend.Emails.send(params, options)
```
```php
$resend = Resend::client('re_xxxxxxxxx');
$resend->emails->send([
'from' => 'Acme ',
'to' => ['delivered@resend.dev'],
'subject' => 'hello world',
'html' => 'it works!
',
], [
'idempotency_key' => 'welcome-user/123456789',
]);
```
```ruby
params = {
"from": "Acme ",
"to": ["delivered@resend.dev"],
"subject": "hello world",
"html": "it works!
"
}
Resend::Emails.send(
params,
options: { idempotency_key: "welcome-user/123456789" }
)
```
```curl
curl -X POST 'https://api.resend.com/emails' \
-H 'Authorization: Bearer re_xxxxxxxxx' \
-H 'Content-Type: application/json' \
-H 'Idempotency-Key: welcome-user/123456789' \
-d $'{
"from": "Acme ",
"to": ["delivered@resend.dev"],
"subject": "hello world",
"html": "it works!
"
}'
```
## Additional Features
**Deliverability Insights**
Particularly useful right after a migration, when you're watching a new domain closely. Resend gives you detailed recommendations on each email sent, so a placement problem surfaces before it becomes a reputation problem.
**React Email**
Mailchimp campaigns live in Mailchimp's template editor. Resend templates are components in your codebase, versioned alongside the rest of your application.
**Multi-Region**
Improve your email deliverability speed by using a region nearest to your users.
## Pricing
Mailchimp bills on contacts. Resend gives you the option to pay based on [contacts](/pricing?product=marketing&contacts=200000), based on [emails](/pricing?product=transactional&contacts=200000), or a combination.
**Key differences**
- Mailchimp's free plan is capped at **250 contacts and 500 emails a month**. Resend's free plan includes **1,000 contacts and 3,000 emails a month**.
- Transactional email is a separate purchase in Mailchimp. It requires a Standard plan or higher, and is billed in blocks of 25,000 emails that expire at the end of each month. In Resend, transactional and marketing email are the same product.
- Both platforms count unsubscribed contacts toward your limit, so the filtering you did above isn't just a deliverability decision, it's a billing one.
_Contacts are only required when using Resend's [Broadcasts](/docs/dashboard/broadcasts/introduction) and [Automations](/docs/dashboard/automations/introduction). If you plan to send only transactional emails, [see our email-based pricing](/pricing?product=transactional&contacts=200000). Mailchimp's rates vary by plan and commitment term, so [check their pricing page](https://mailchimp.com/pricing/marketing/) for a current comparison._